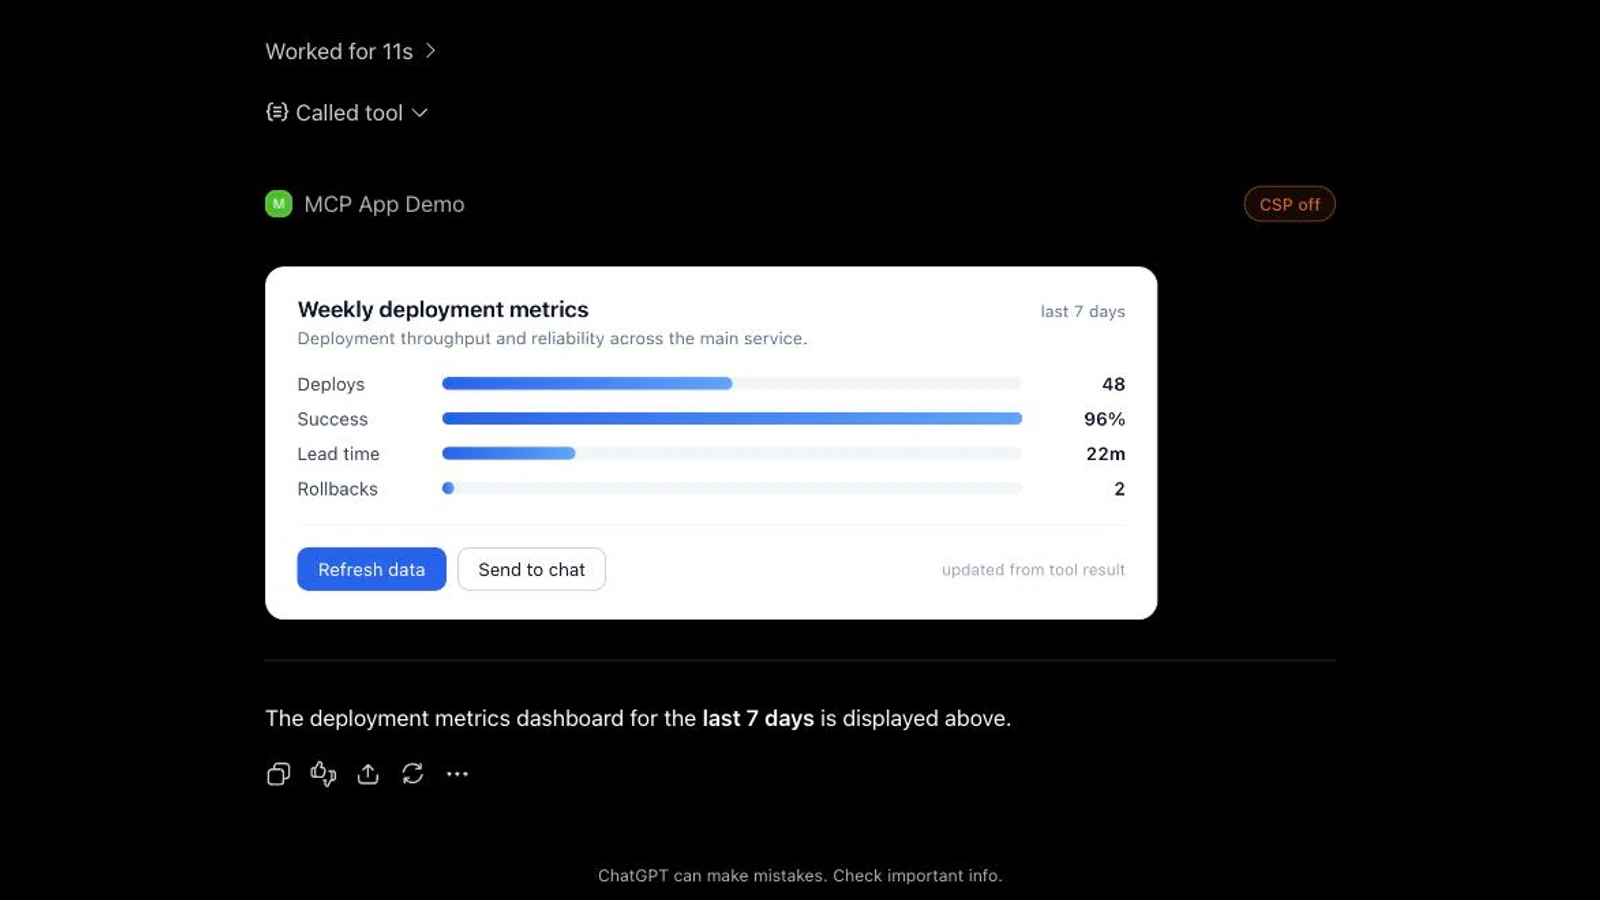
Finish this guide and you will have a working MCP server that renders interactive React or HTML components directly inside the ChatGPT interface, using the MCP Apps standard.
Add UI to your MCP server for dashboards, forms, and visualizations that go beyond text-based replies.
You need Node.js 18 or higher and an existing MCP server project. You also need a paid ChatGPT plan with developer mode enabled to connect and test your local development server.
The complete sample project for this guide is on GitHub: camnangai-public-sources/mcp-app-demo.
Step 1 — Create the project and install the MCP Apps packages
Create a new project directory and initialize npm.
mkdir mcp-app-demo && cd mcp-app-demo
npm init -y
Install the core MCP and extension packages along with the Express framework for serving the transport, plus dev dependencies for TypeScript and Vite.
npm install @modelcontextprotocol/ext-apps @modelcontextprotocol/sdk express cors zod
npm install -D typescript vite vite-plugin-singlefile @types/express @types/cors tsx
After installing, verify that your package.json includes "type": "module" to enable ES module
syntax. These packages bridge the UI iframe and the MCP host.
Add three scripts to package.json:
{
  "scripts": {
    "build": "vite build",
    "serve": "tsx server.ts",
    "dev": "INPUT=mcp-app.html npm run build && npm run serve"
  }
}
By the end of this guide the project looks like this:
mcp-app-demo/
├── package.json
├── tsconfig.json
├── vite.config.ts      # bundles the UI into a single HTML file
├── server.ts           # MCP server, reads ./dist/mcp-app.html
├── mcp-app.html        # UI entry point
└── src/
    └── mcp-app.ts      # client-side UI logic
Step 2 — Build the UI and connect it to the host with the App class
Create an src/mcp-app.ts file to handle the client-side logic of your UI. Use the App class to
connect to the ChatGPT host.
import { App } from "@modelcontextprotocol/ext-apps";

const app = new App({ name: "My MCP UI", version: "1.0.0" });

// Establish the JSON-RPC bridge over postMessage
app.connect();

// Handle data pushed from the host when a tool is invoked
app.ontoolresult = (result) => {
  console.log("Received tool result:", result.structuredContent);
  // Update your UI components with the result data here
};

// Proactively call a server tool from the UI
async function handleUserInput() {
  const response = await app.callServerTool({
    name: "my-data-tool",
    arguments: { query: "example" },
  });
  console.log("Tool response:", response);
}
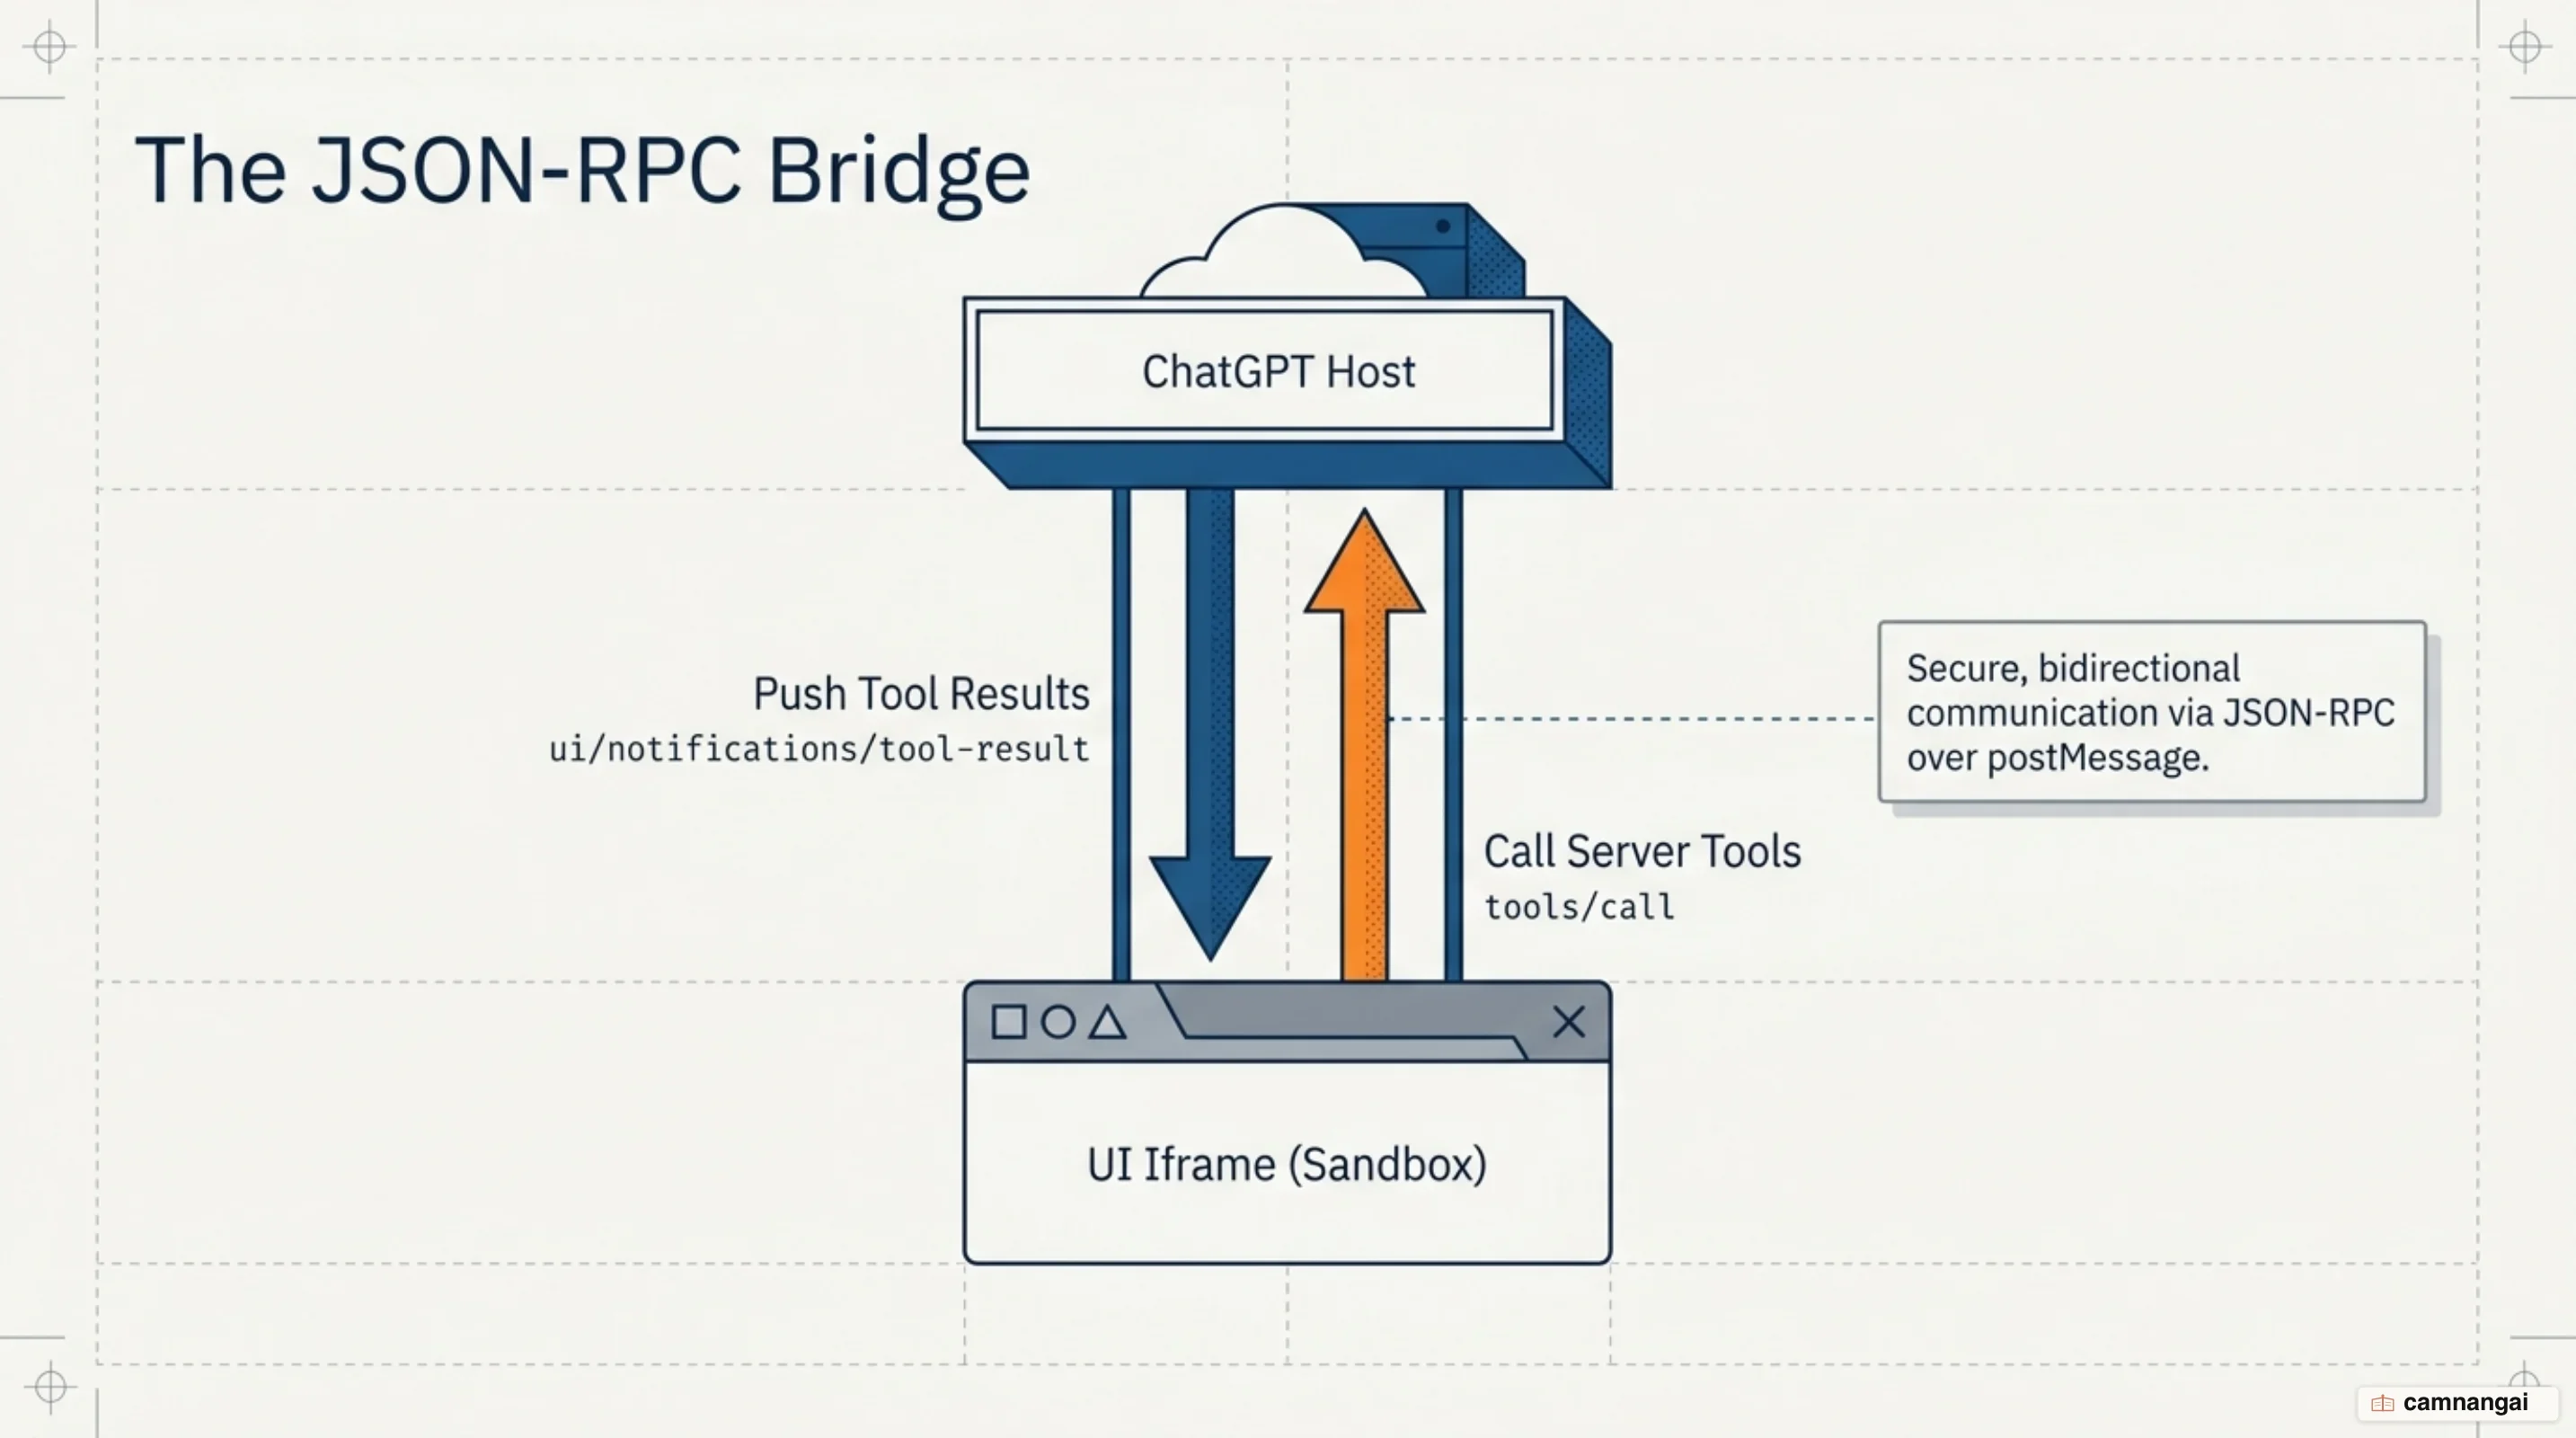
app.connect() opens the JSON-RPC bridge over postMessage, so the iframe can communicate
securely with the ChatGPT host. ontoolresult reacts to results from the initial
model-driven tool call, while callServerTool lets the UI trigger server logic independently —
useful for refresh buttons or manual state updates inside the component.