You will finish with an agent running a complete AI coding workflow built on mattpocock/skills. The pipeline runs from requirements grilling, through a spec and tracer-bullet tickets, to test-driven implementation and a review before every commit. It replaces vibe coding with documentation and verified, test-driven code.
You need a terminal with Claude Code or a Node.js environment installed, a real Git repository to work in, and an issue tracker for the agent to sync work against.
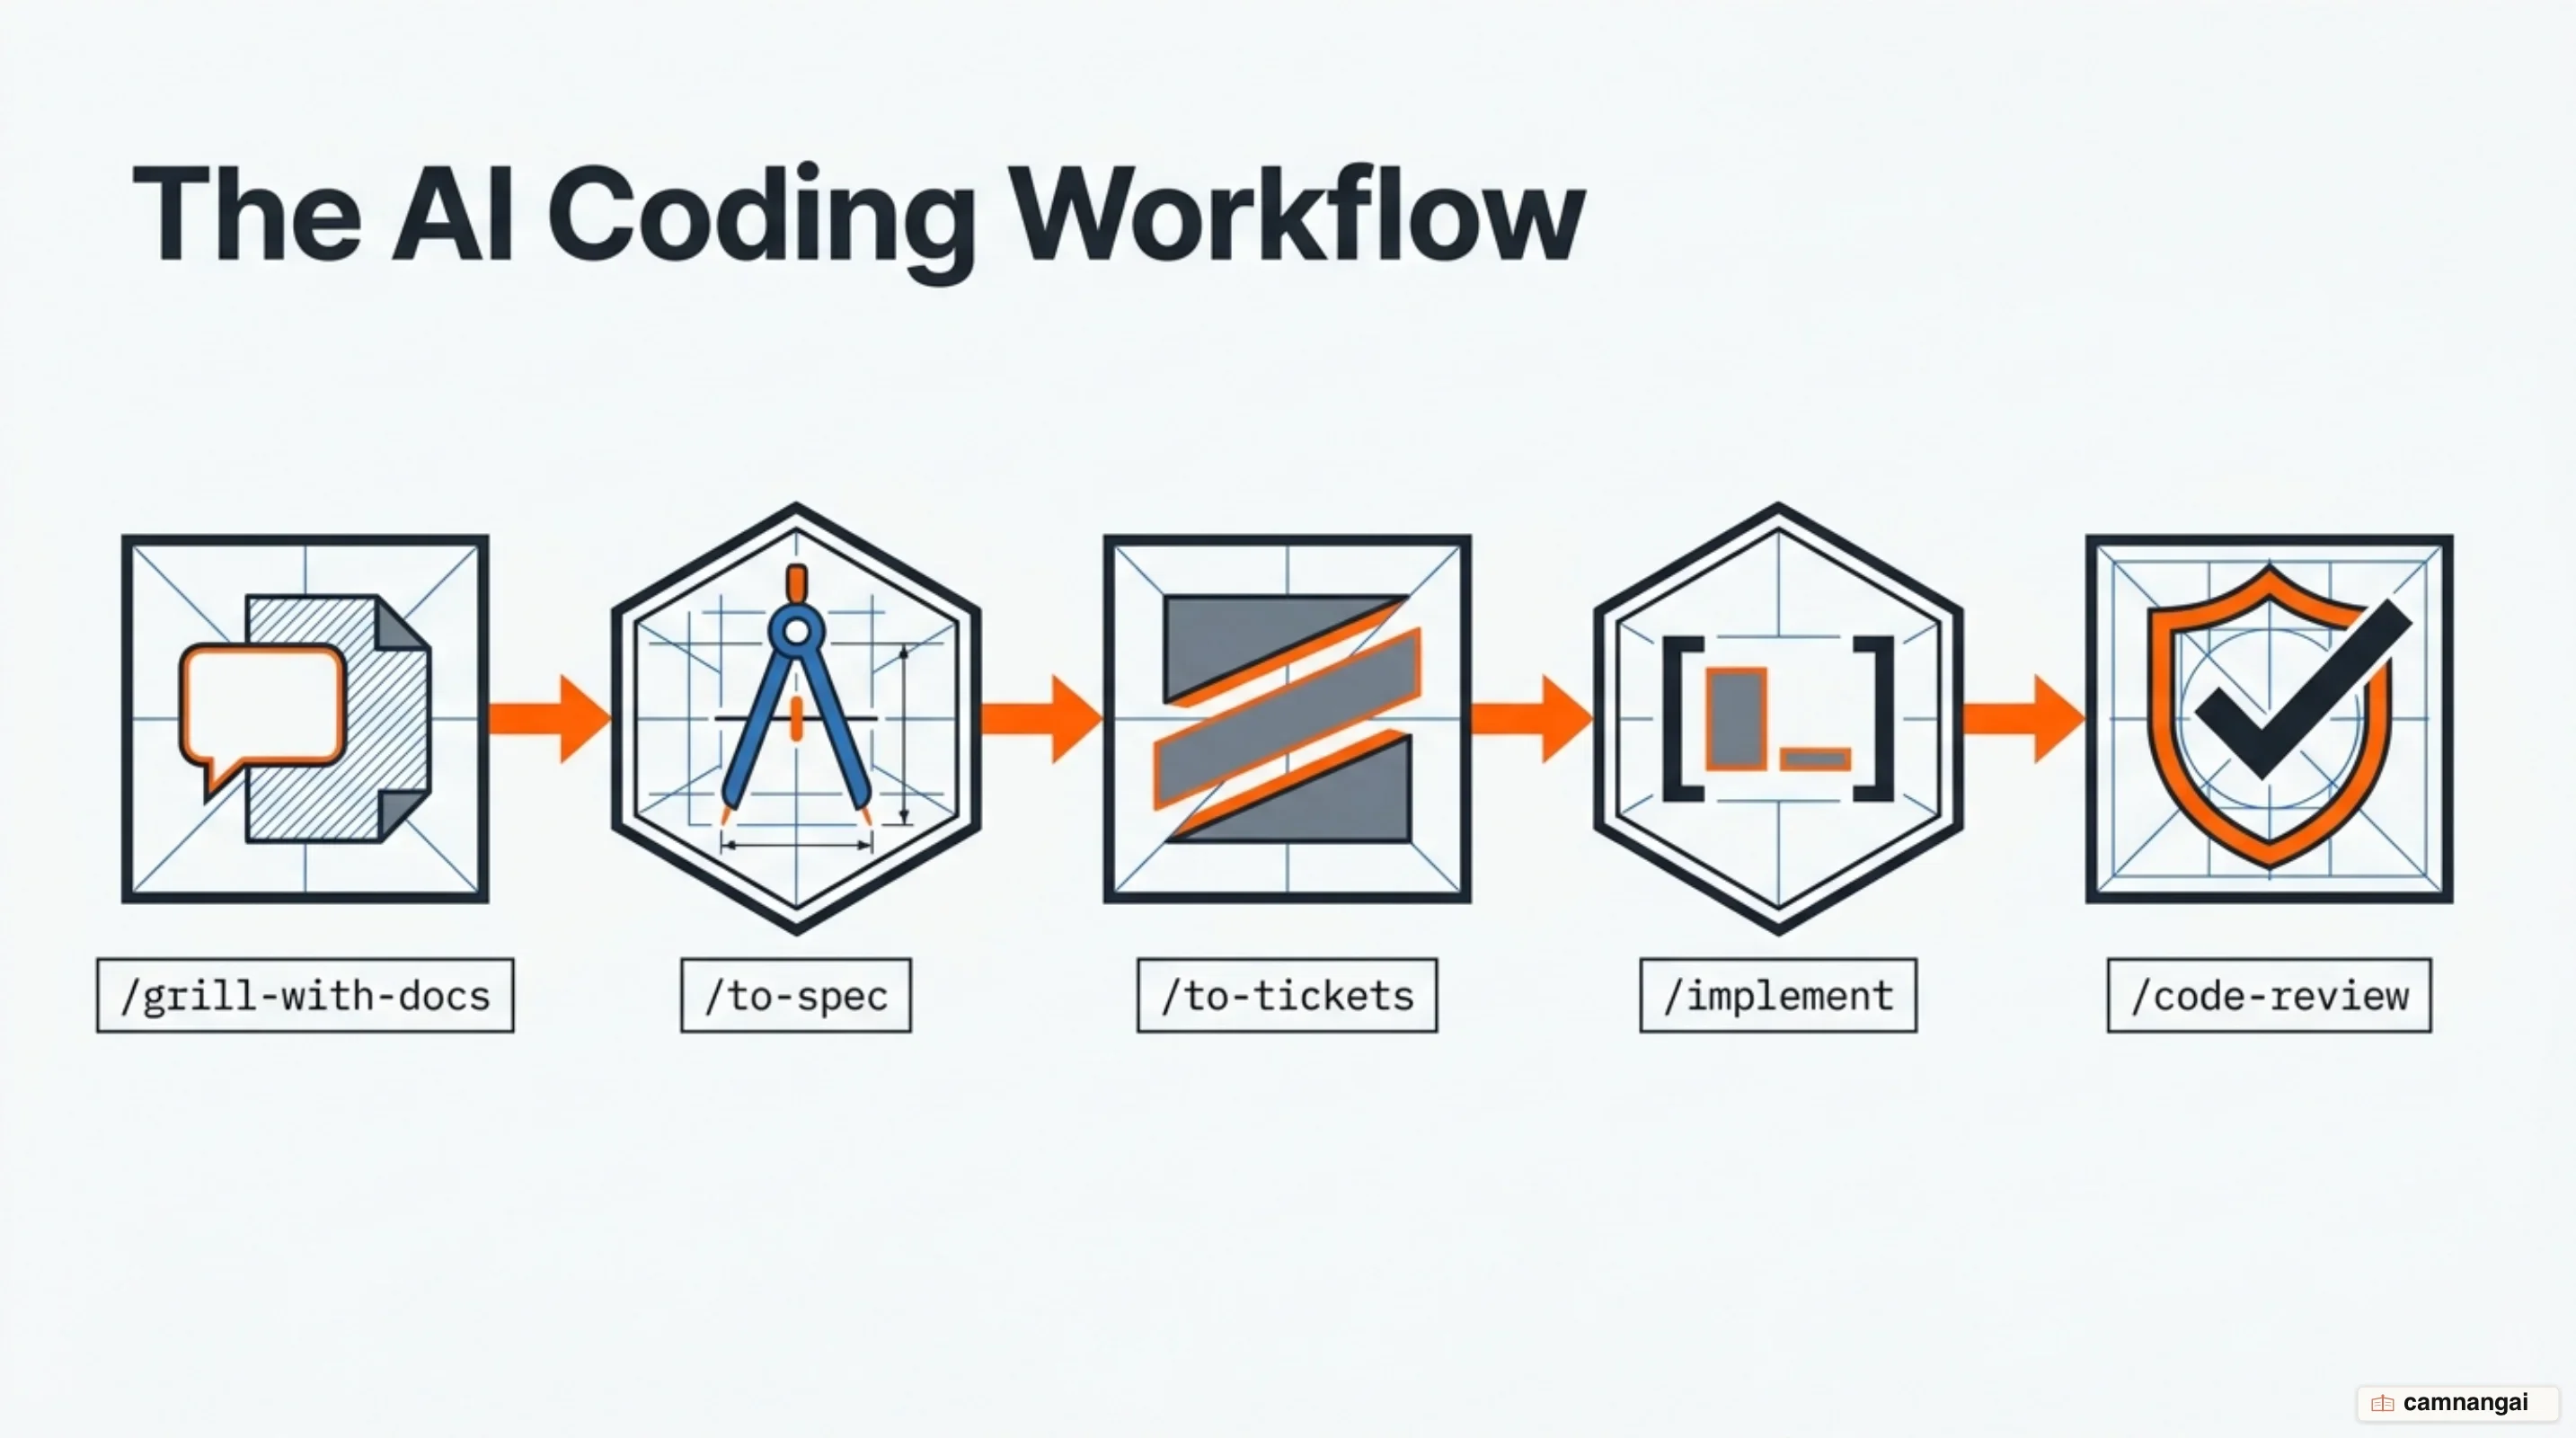
Step 1 — Install the skills into your agent
Pick one of the two below, and skip the other.
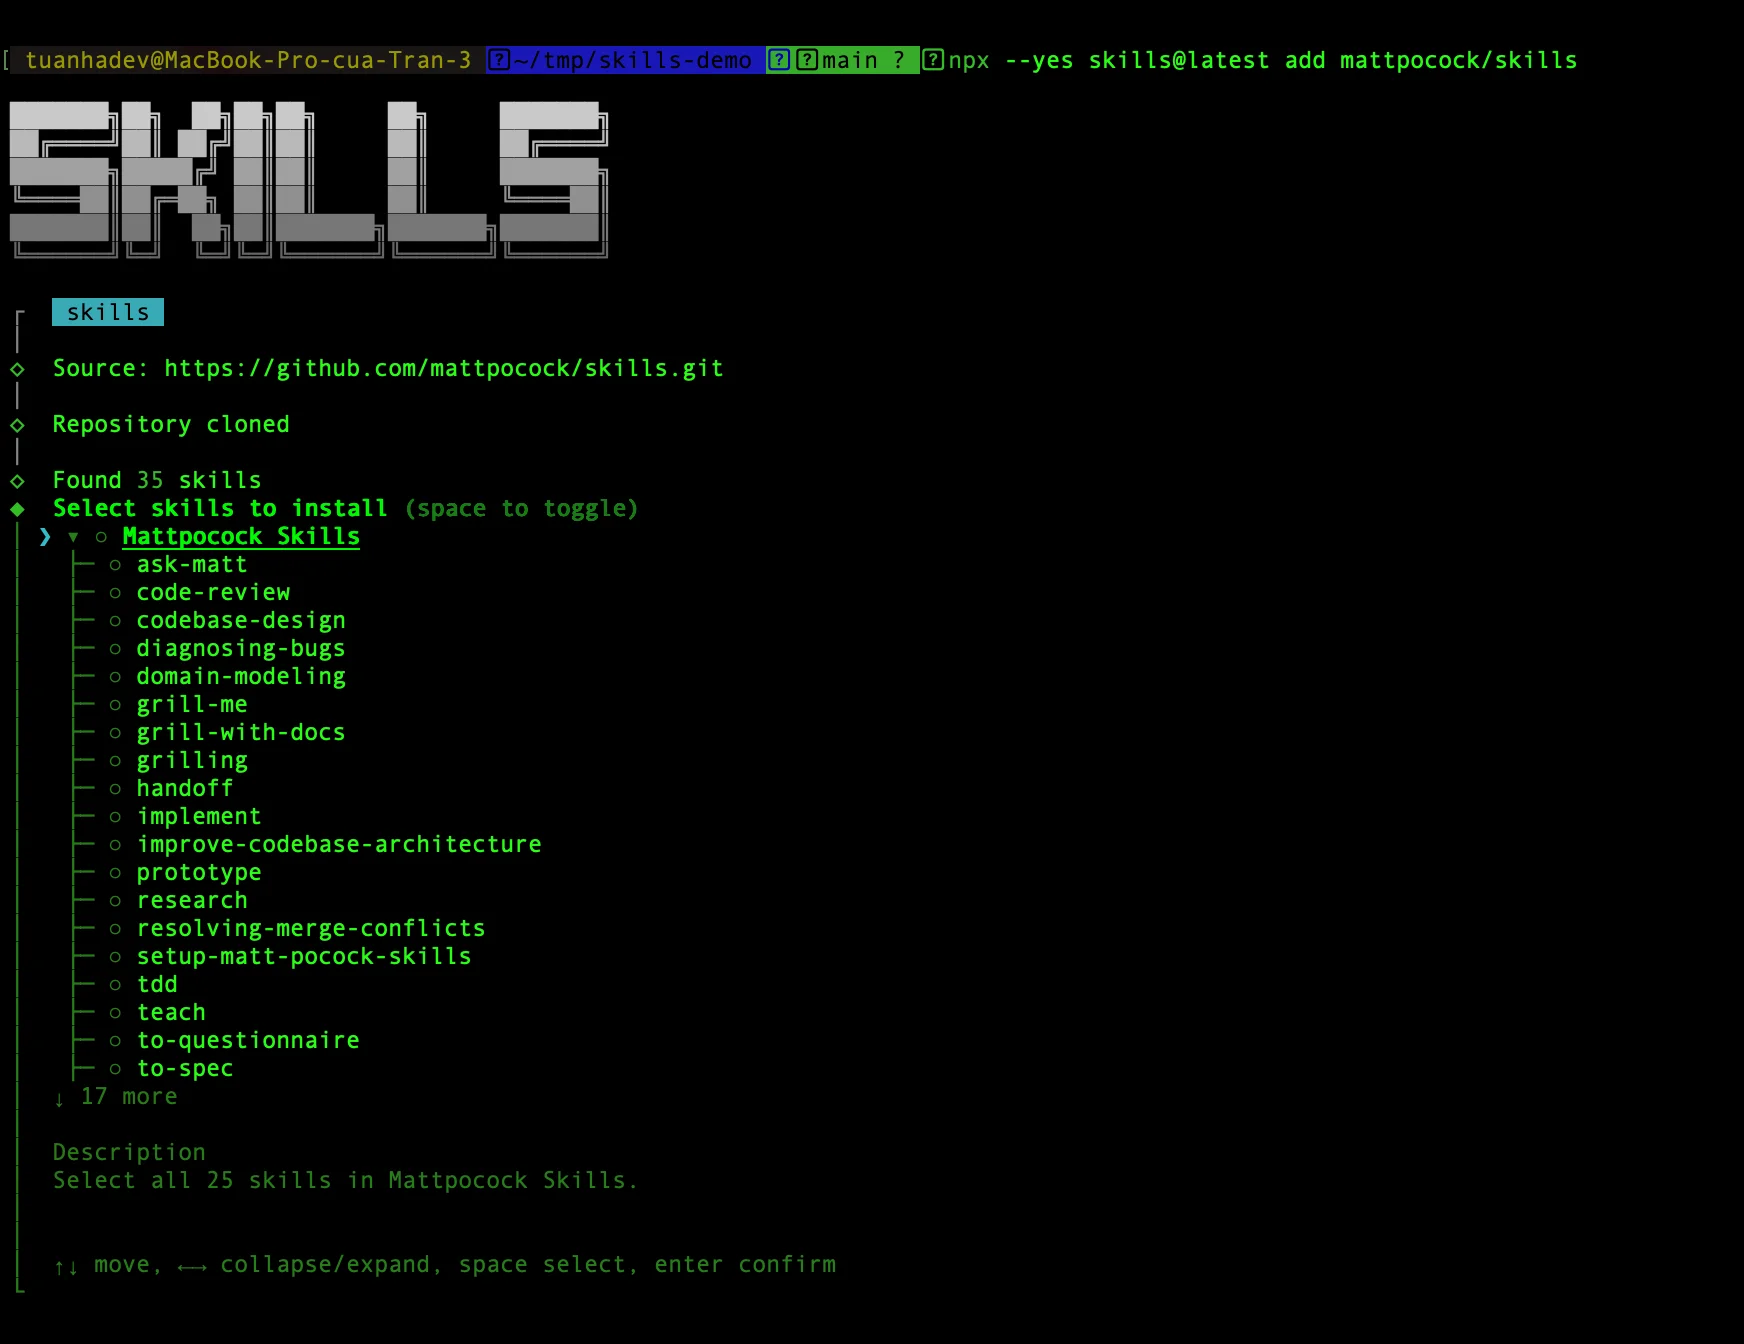
Install as Claude Code plugin
Run the official marketplace command:
claude plugins install mattpocock-skillsThis installs the skills as a read-only bundle that stays current with the upstream repository. Choose it when you want the author's updates without managing files yourself.
Install via npx for other agents
For Codex or other agents, use the universal installer:
npx skills@latest add mattpocock/skillsThis copies editable files into your repository, so you own the logic and can customize it. Updates only land when you run the update command, which keeps your local changes. This is the one I use, because most of the value in these skills only shows up once you rewrite the prompts to match how your team already works.
Step 2 — Confirm the skills loaded
Open the /skills menu inside a Claude Code session, or ask directly: "What skills are available?".
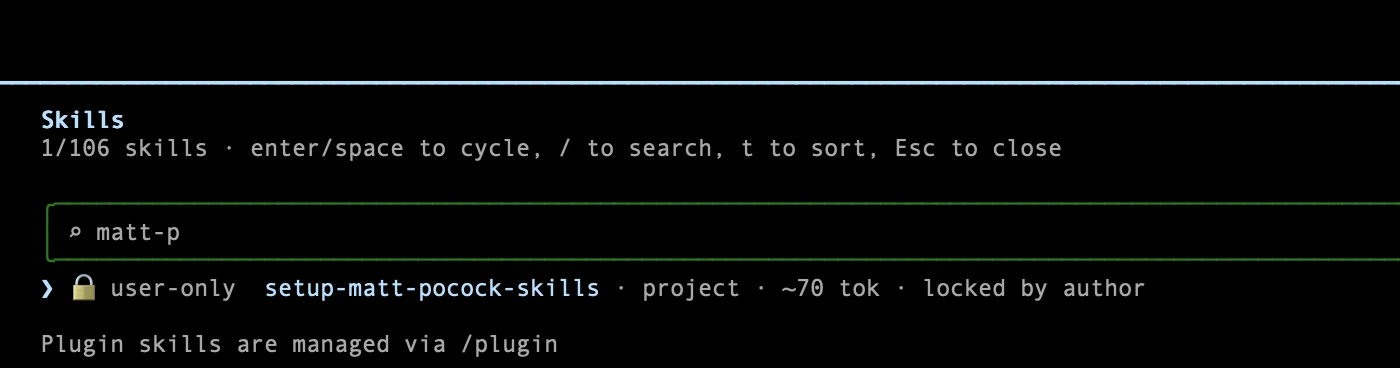
The list must include the core commands: /grill-with-docs, /implement, /to-spec, and /setup-matt-pocock-skills. If you installed the plugin and the summary reports Run /reload-plugins to activate., run that command to activate them in the current session. On other agents, npx skills list prints every installed skill.
Step 3 — Configure your repo with /setup-matt-pocock-skills
Run the setup skill from the root of your repository:
/setup-matt-pocock-skills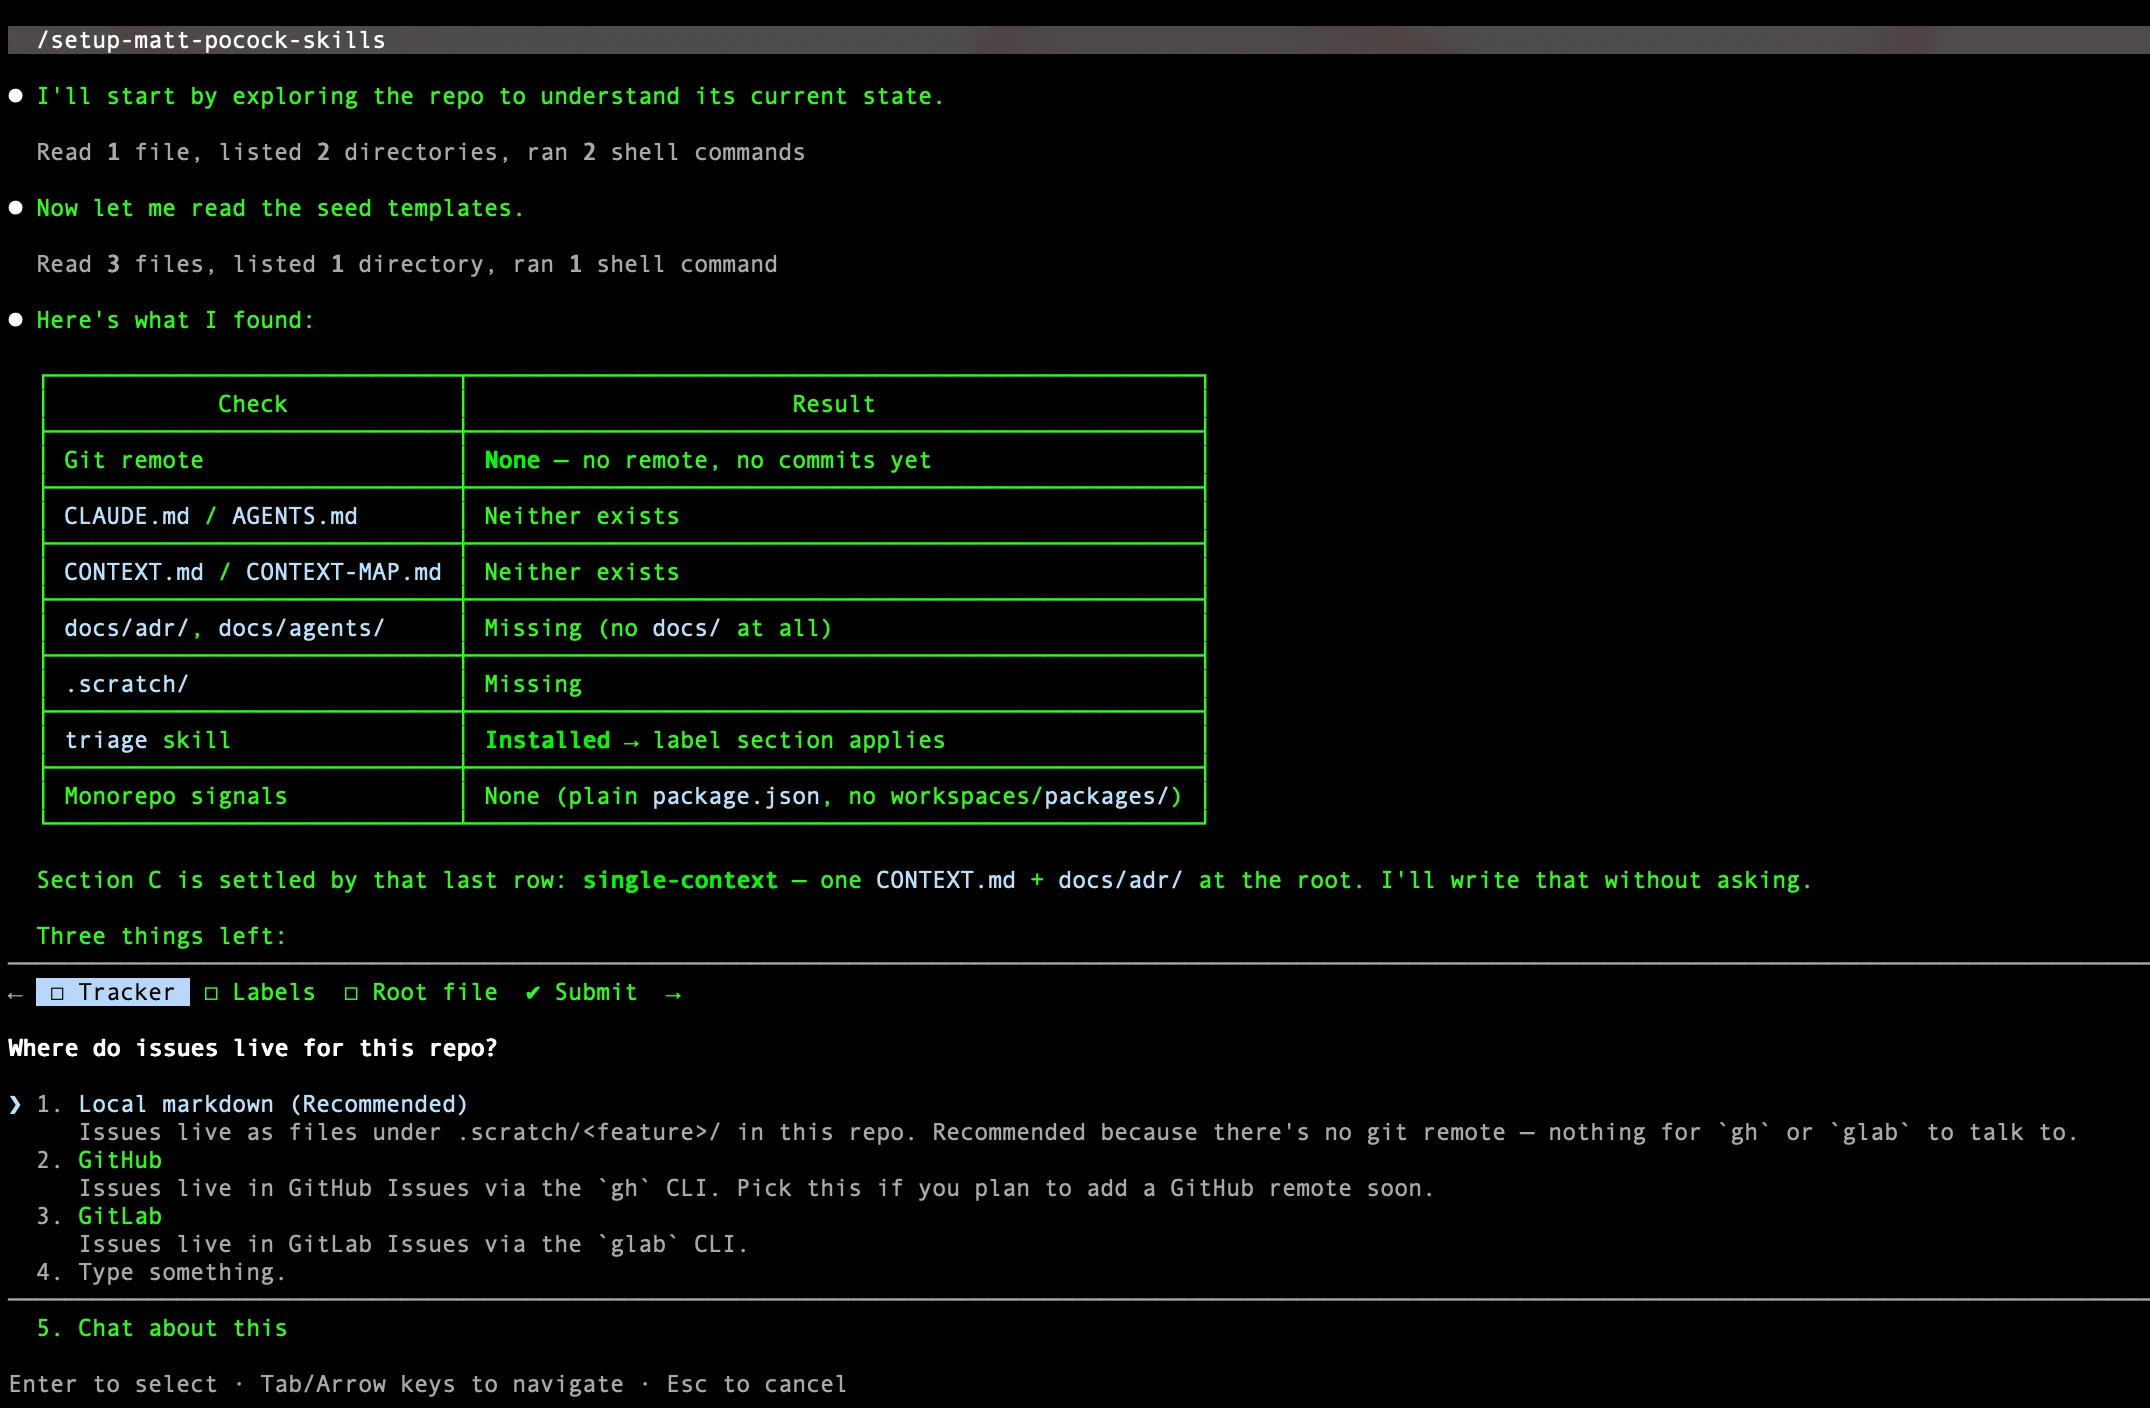
The skill identifies your issue tracker, triage labels, and documentation paths. GitHub, GitLab, and local Markdown ship as ready-made templates; other trackers such as Linear or Jira go through the "Other" path, where you describe your workflow and the skill records it. It writes these settings as Markdown files in docs/agents/ (for example issue-tracker.md) and adds an ## Agent skills block to CLAUDE.md or AGENTS.md. Because the other skills read those files at runtime, you never edit skill logic to point at a different tool.
Step 4 — Lock the plan with /grill-with-docs
Begin the engineering cycle by aligning on the requirements for a specific change:
/grill-with-docsThe agent runs a relentless one-question-at-a-time interview to eliminate ambiguity. It writes the project vocabulary straight into CONTEXT.md and records architectural decisions as ADRs in docs/adr/. Keep CONTEXT.md an implementation-free glossary — it is not a place for scratch notes or specs.
A shared vocabulary is what makes later sessions cheap. Once the agent knows what a term means in your codebase, it stops re-deriving it and spends its budget on the logic instead.
Step 5 — Split the work with /to-spec and /to-tickets
Turn the grilling conversation into work items with two sequential commands:
- Run
/to-specto turn that conversation into a formal specification published to your tracker. - Run
/to-ticketsto break that spec into tracer-bullet tickets — vertical slices that carry clear blocking dependencies.
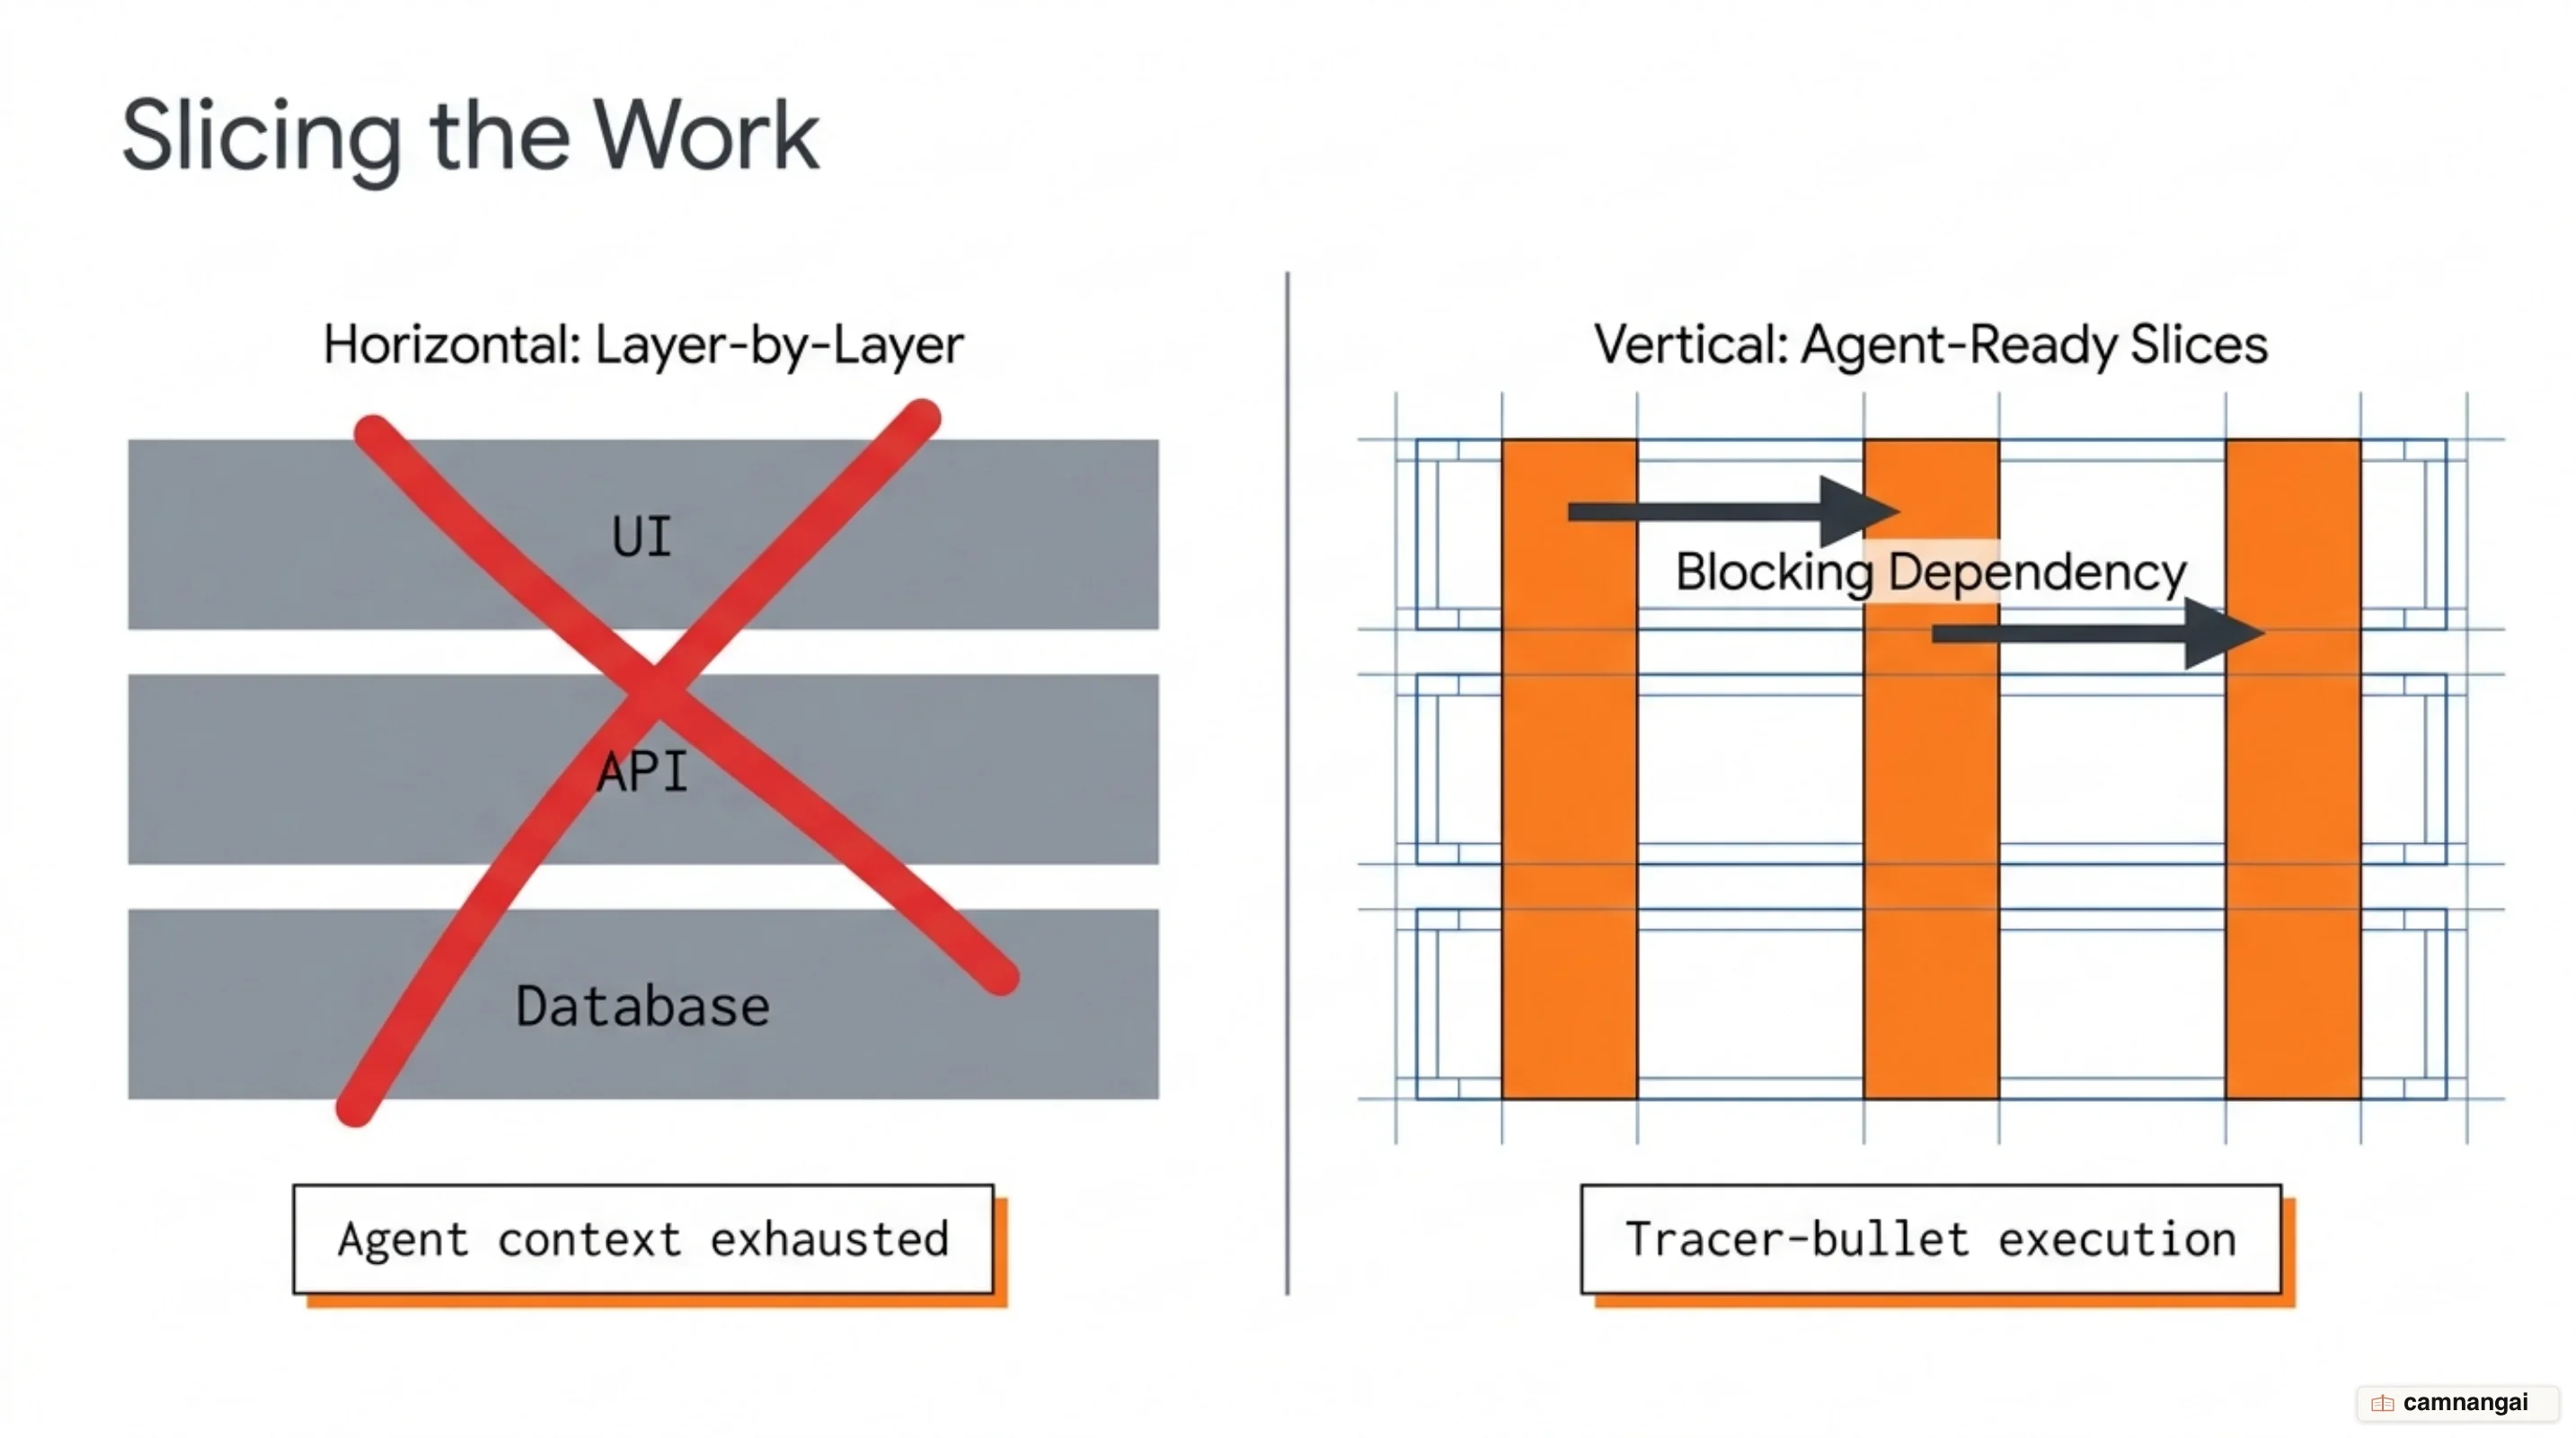
That gives you a backlog the agent executes in isolated sessions, each sized to a single context window, instead of holding one massive plan in active context.
Step 6 — Build with /implement and close with /code-review
Always pass the full reference — owner/repo#42 or the issue URL. A bare #42 gets resolved against whatever numbered list the agent can see in a fresh session, which is how it ends up building the wrong thing. The skill then follows a five-beat loop:
- Work out seams: identify the public boundaries where tests will live.
- Drive TDD: run the red-green loop through the agreed seams.
- Typecheck: run continuous static analysis and single test files.
- Test suite: run the full suite once at the end.
- Review and commit: run
/code-review, then commit to the current branch.
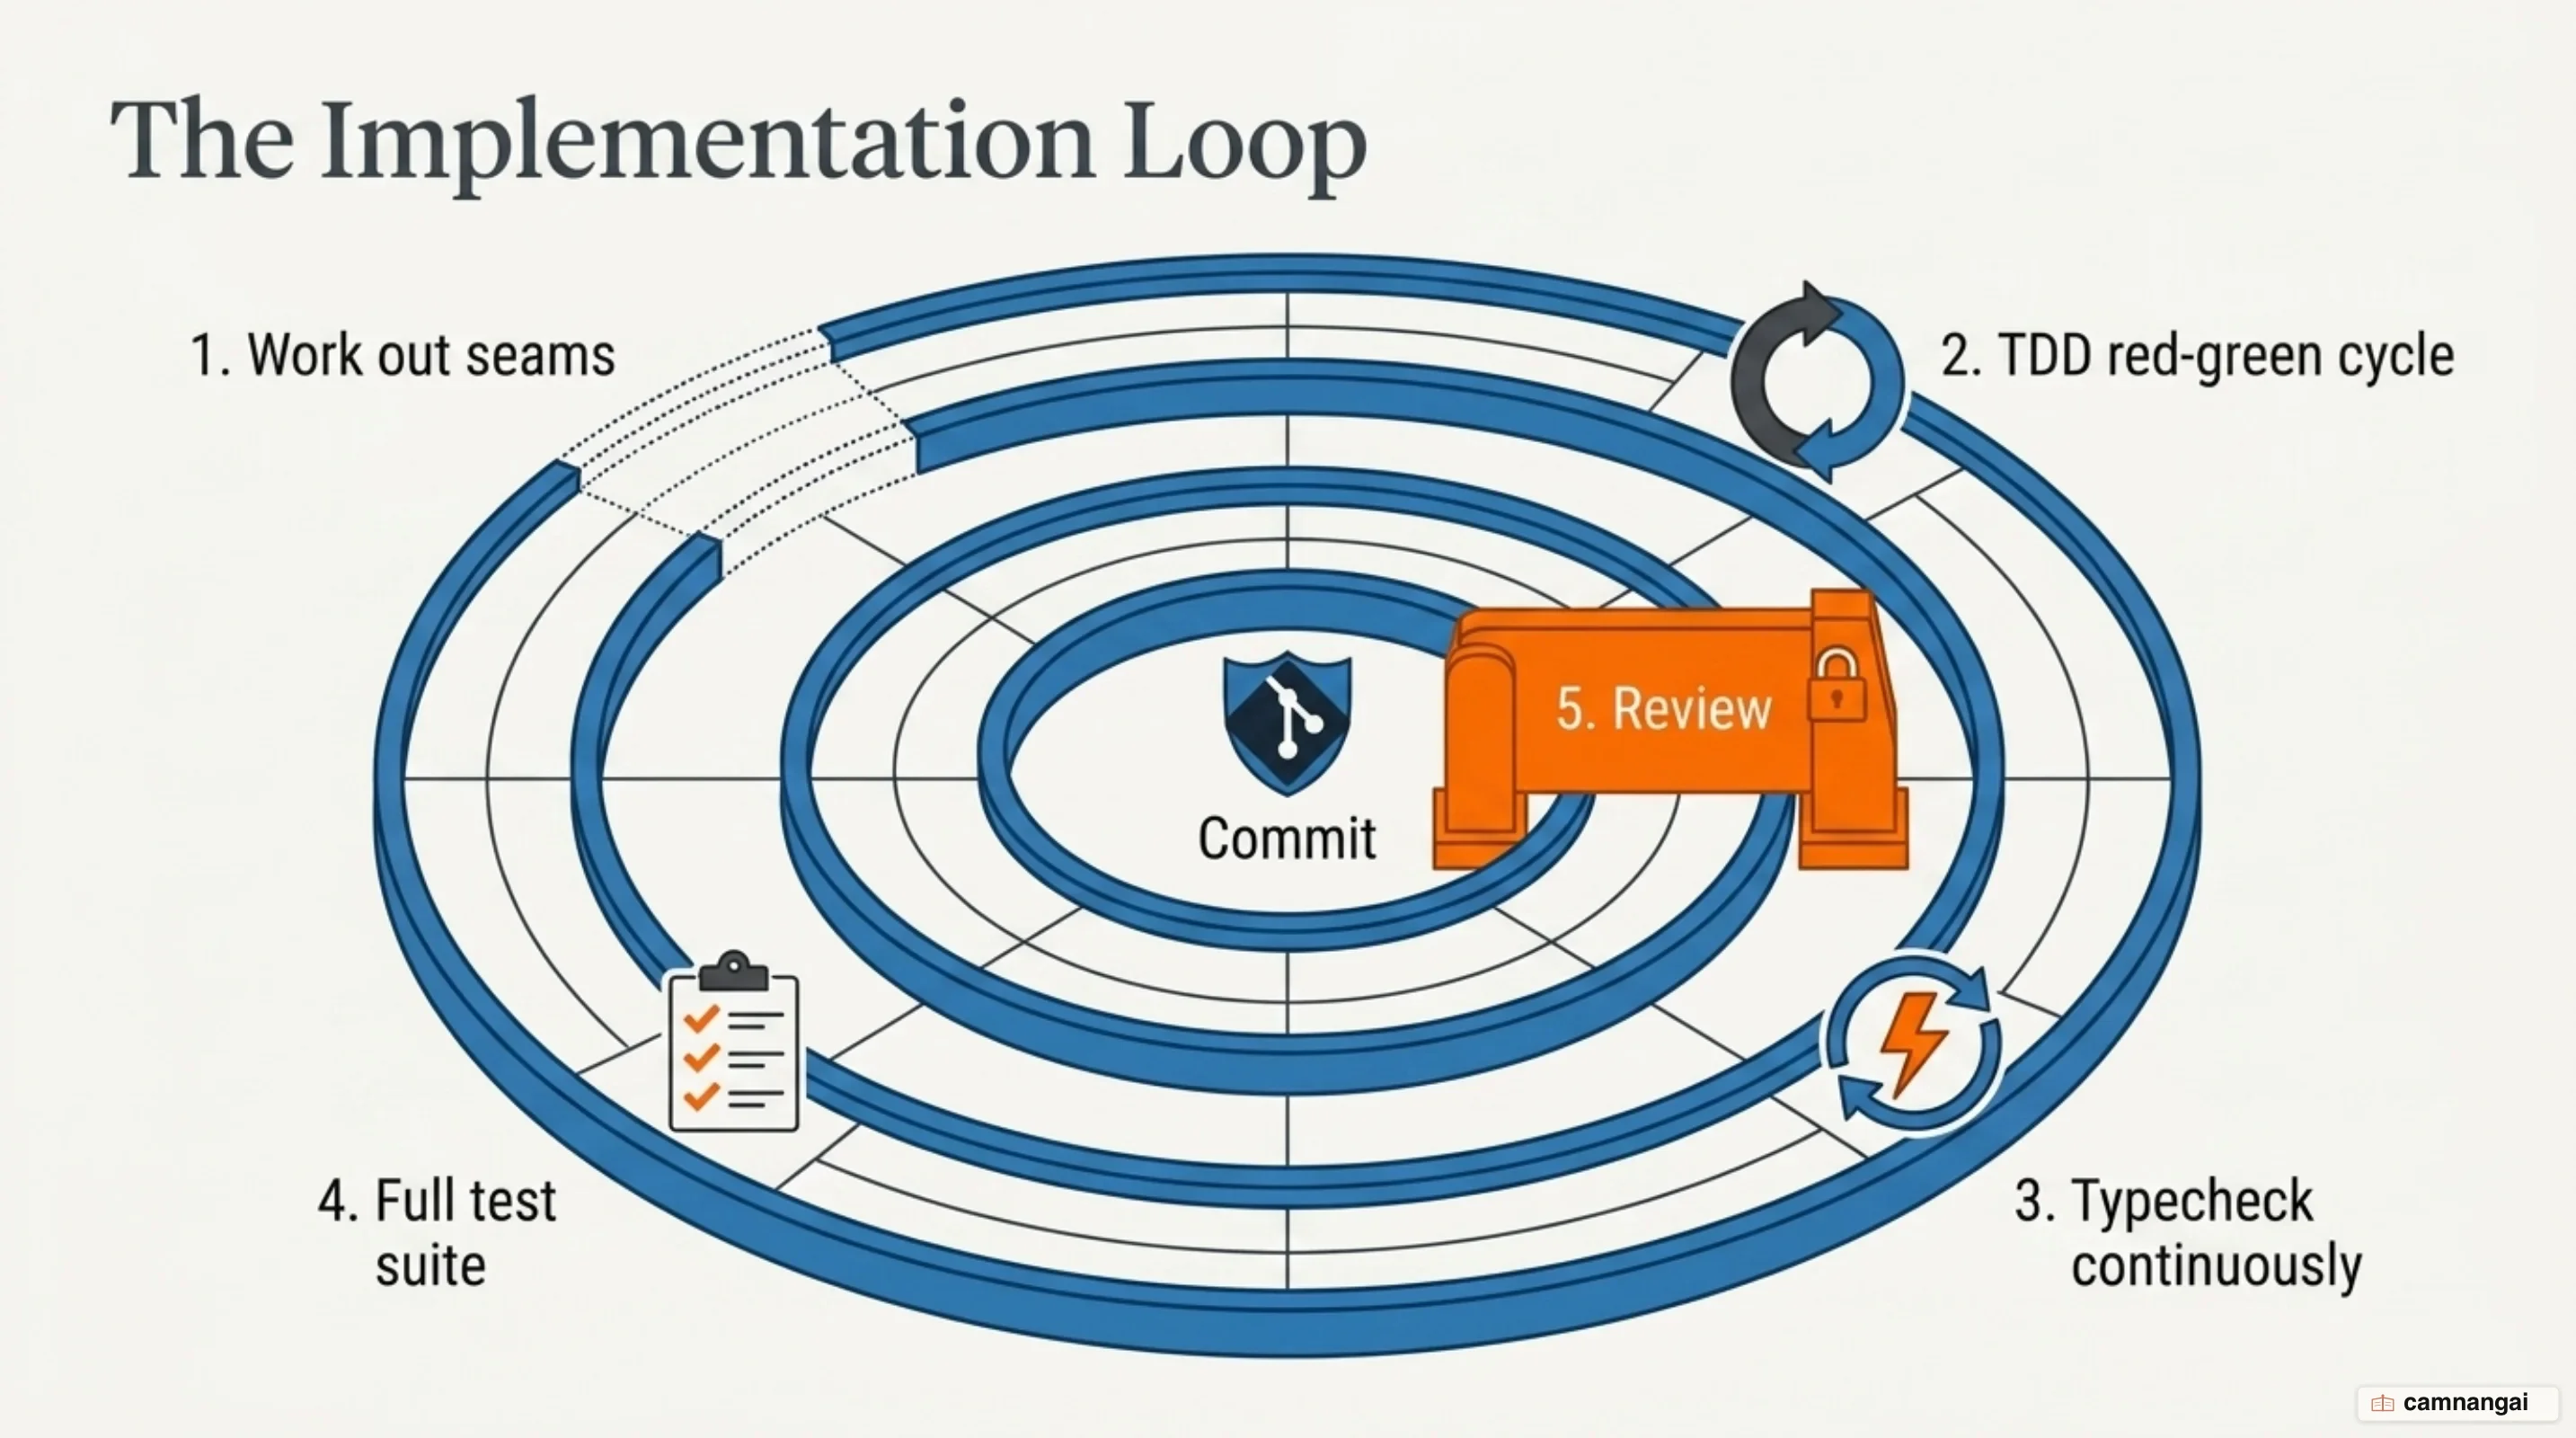
Beat 5 runs the review before the commit — don't reverse it. /implement also never closes
tickets or ticks acceptance boxes, so reconcile and close them yourself.
Clear your context between tickets. Each ticket is self-contained, so carrying the previous one's context forward buys you nothing and eats the room you need for this one.
Daily-use skill reference
| Skill | Purpose | Type |
|---|---|---|
/ask-matt | Router: ask which skill fits the situation in front of you. | User-invoked |
/tdd | Red-green-refactor loop at the agreed seams. | Model-invoked |
/diagnosing-bugs | Disciplined loop: reproduce → minimize → hypothesize → fix. | Model-invoked |
/wayfinder | Plan work too big for a single agent session. | User-invoked |
/improve-codebase-architecture | Scan the codebase for architectural improvements. | User-invoked |
Troubleshooting
| Error text | Cause | Fix |
|---|---|---|
Skill not triggering | The description lacks the keywords you actually say, or the frontmatter YAML is malformed. | Run with --debug to see the parse error. Rephrase to match the description, or invoke /skill-name directly. |
Unexpected key(s) in SKILL.md frontmatter | A field outside the six allowed ones: name, description, license, compatibility, metadata, allowed-tools. | Remove the non-standard fields if you plan to share the skill on claude.ai or through the API. |
Skill descriptions are cut short | The skill listing exceeded its context budget, which defaults to 1% of the model's context window. | Raise skillListingBudgetFraction in settings, or set low-priority skills to "name-only" in skillOverrides. |
Next step
Pick one fuzzy feature request in the repository you are working in right now and run /grill-with-docs on it. Watch CONTEXT.md change after each answer — that is the fastest way to see what this workflow adds over asking an agent to "build the thing".
References
- GitHub - mattpocock/skills: Skills for Real Engineers
- The /setup-matt-pocock-skills Skill — AI Hero
- The /grill-with-docs Skill — AI Hero
- The /to-tickets Skill — AI Hero
- The /implement Skill — AI Hero
- GitHub - vercel-labs/skills: The open agent skills tool
- Extend Claude with skills — Claude Code Docs
- Matt Pocock's skills, mapped (v1.1) — Skillselion
- mattpocock/skills: A complete AI Coding workflow, end-to-end — YouTube