By the end of this guide you will have a working research environment built on your own documents, answers you can trace to the exact passage they came from, and finished output (reports, slides, audio) generated from that same material. Gemini Notebook, the name NotebookLM took in July 2026, answers only from the sources you load, which removes most of the hallucination risk before you ask anything.
Before you start you need a Google account with verified age (18+), access from a supported region, and the source material itself: documents, web links, public YouTube URLs with captions, audio files, images, or files straight from Google Drive.
Step 1 — Create one notebook per project
Go to notebook.google.com and click "Create new notebook."
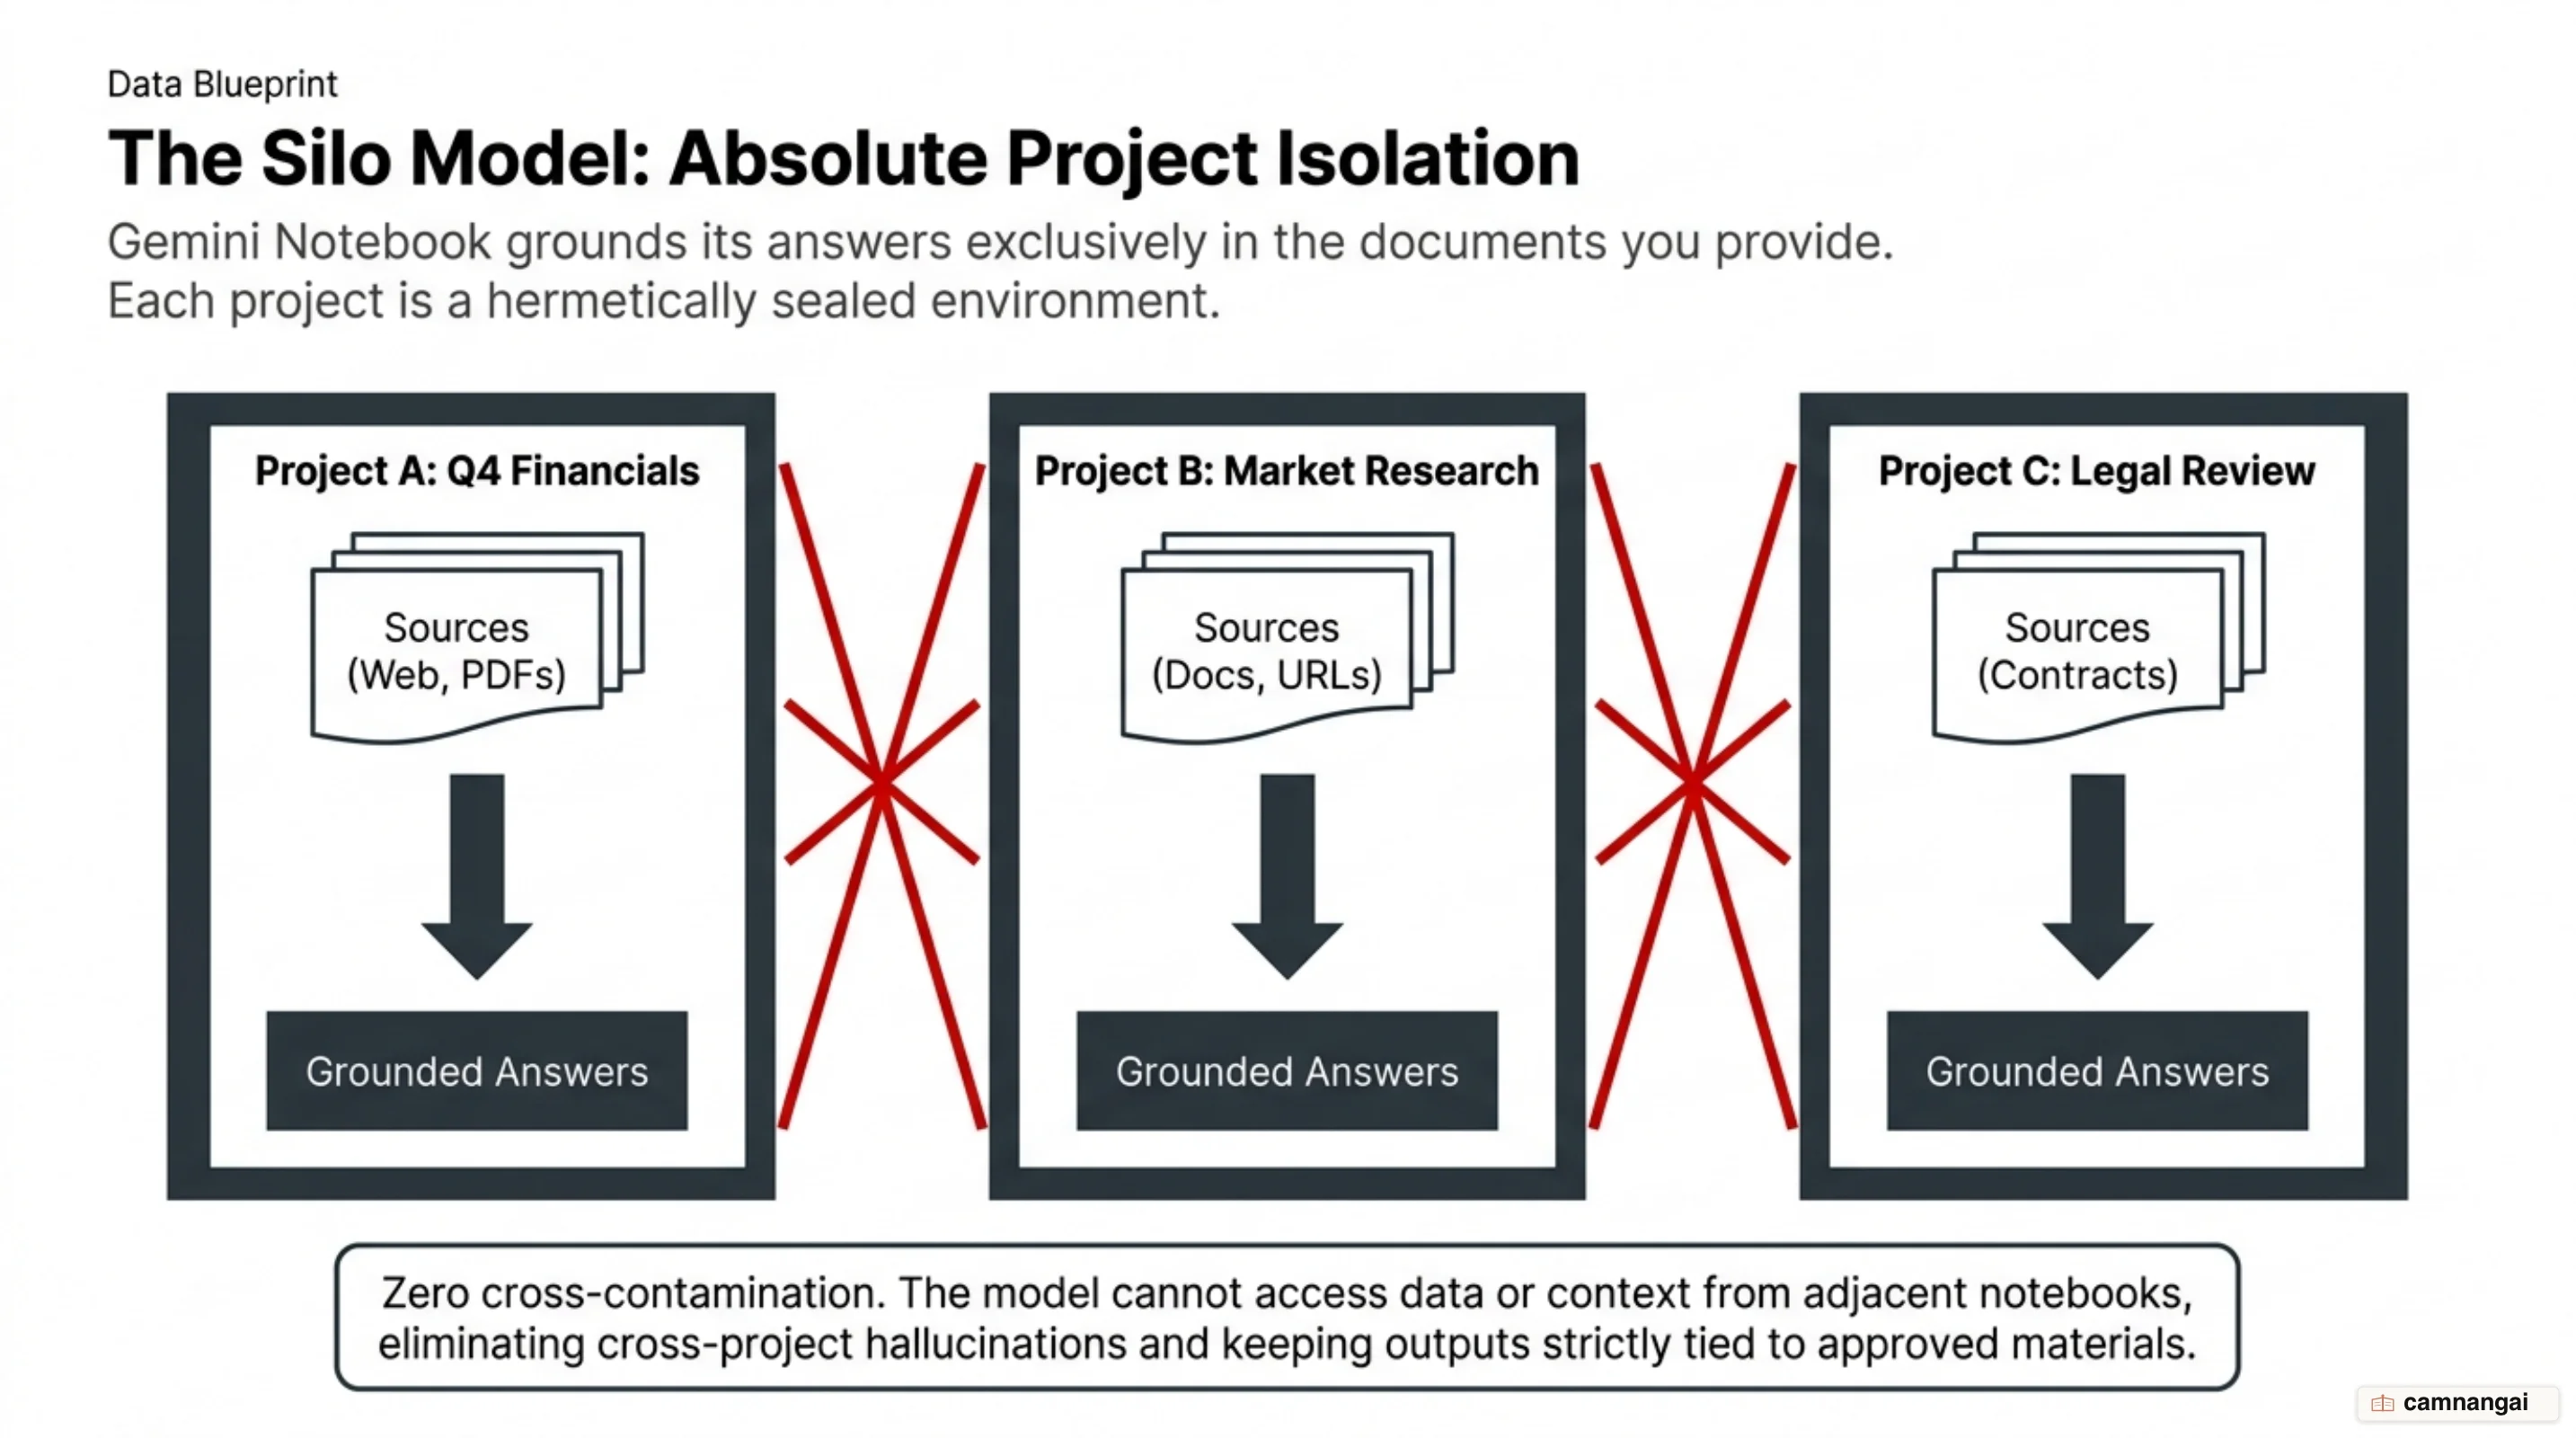
Each notebook is an isolated environment, so it cannot read sources or data from any other notebook in your account. Keep one project per notebook, then click the default emoji to set a distinctive one, which sounds trivial until the sidebar is a wall of them and you are hunting for the right one. You know the notebook is ready when the "Add sources" panel opens.
Step 2 — Load your sources and confirm they landed
Pick the method that matches your material.
Import from Google Drive or local files
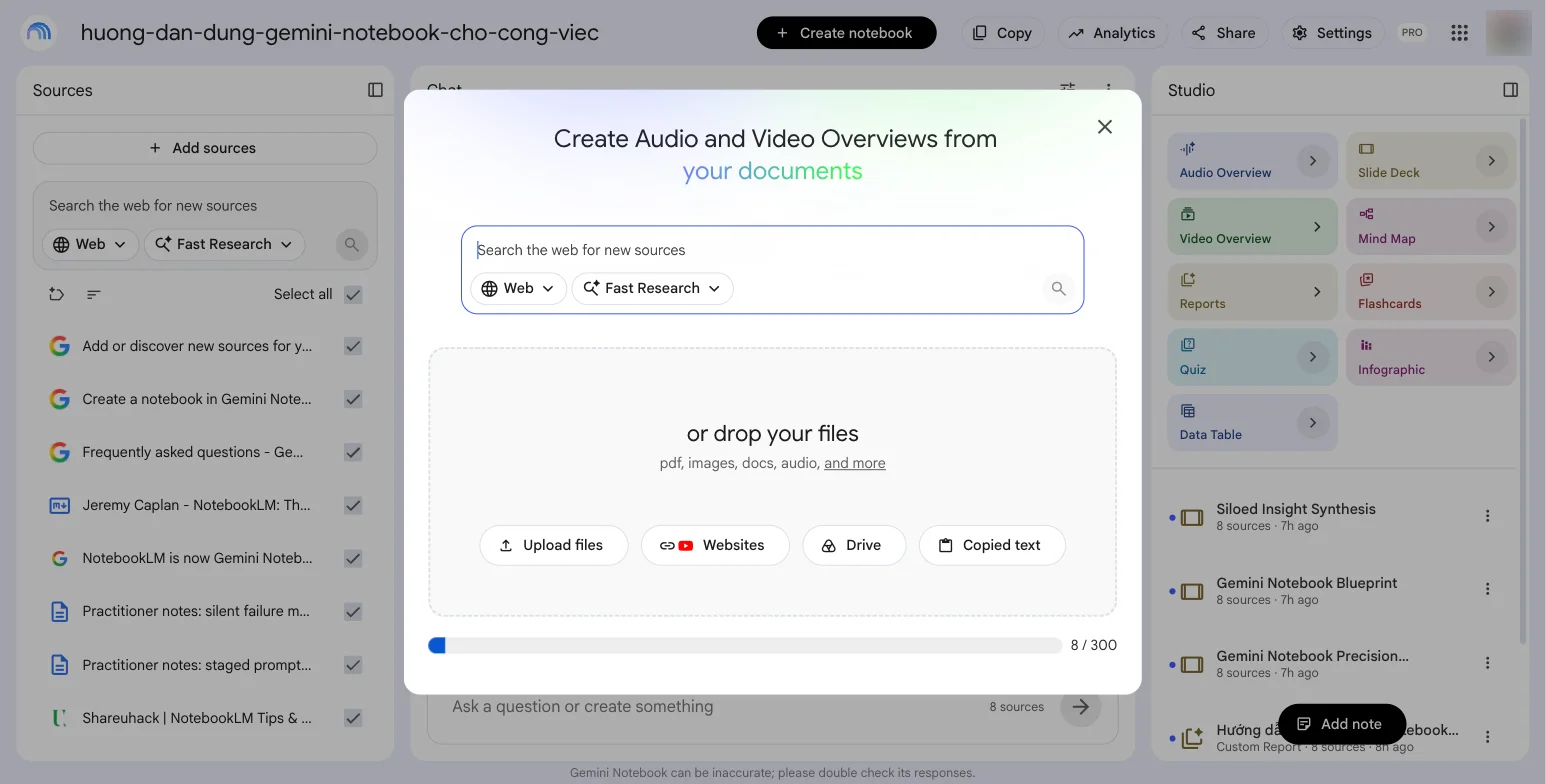
Upload PDFs, Word documents, Markdown, or EPUB files, and sync Google Docs, Slides, and Sheets. Each source holds up to 500,000 words or 200MB. Google Slides is capped at 100 slides per file and Google Sheets at 100,000 tokens. Sources imported from Drive auto-sync every few minutes to mirror the parent document.
Pull in web pages or YouTube transcripts
Paste public URLs to bring in their text. YouTube works only for public videos that carry user-uploaded or auto-generated captions, and videos uploaded less than 72 hours ago may not import yet. Only the text transcript comes across, not the video or audio stream itself.
Extract from audio or images
Upload audio files (MP3, WAV, and others) or images (.png, .jpg, .webp, .heic, and more). Gemini Notebook transcribes spoken audio across 80+ languages, and optical character recognition pulls text out of images, including photographs of handwritten notes.
Discover sources with Fast or Deep Research
Use the search box in the "Add" panel to run live queries:
- Fast Research runs a quick web or Drive lookup to close a specific gap.
- Deep Research plans its own research, scans hundreds of sites, and compiles a multi-page report you can import as a source.
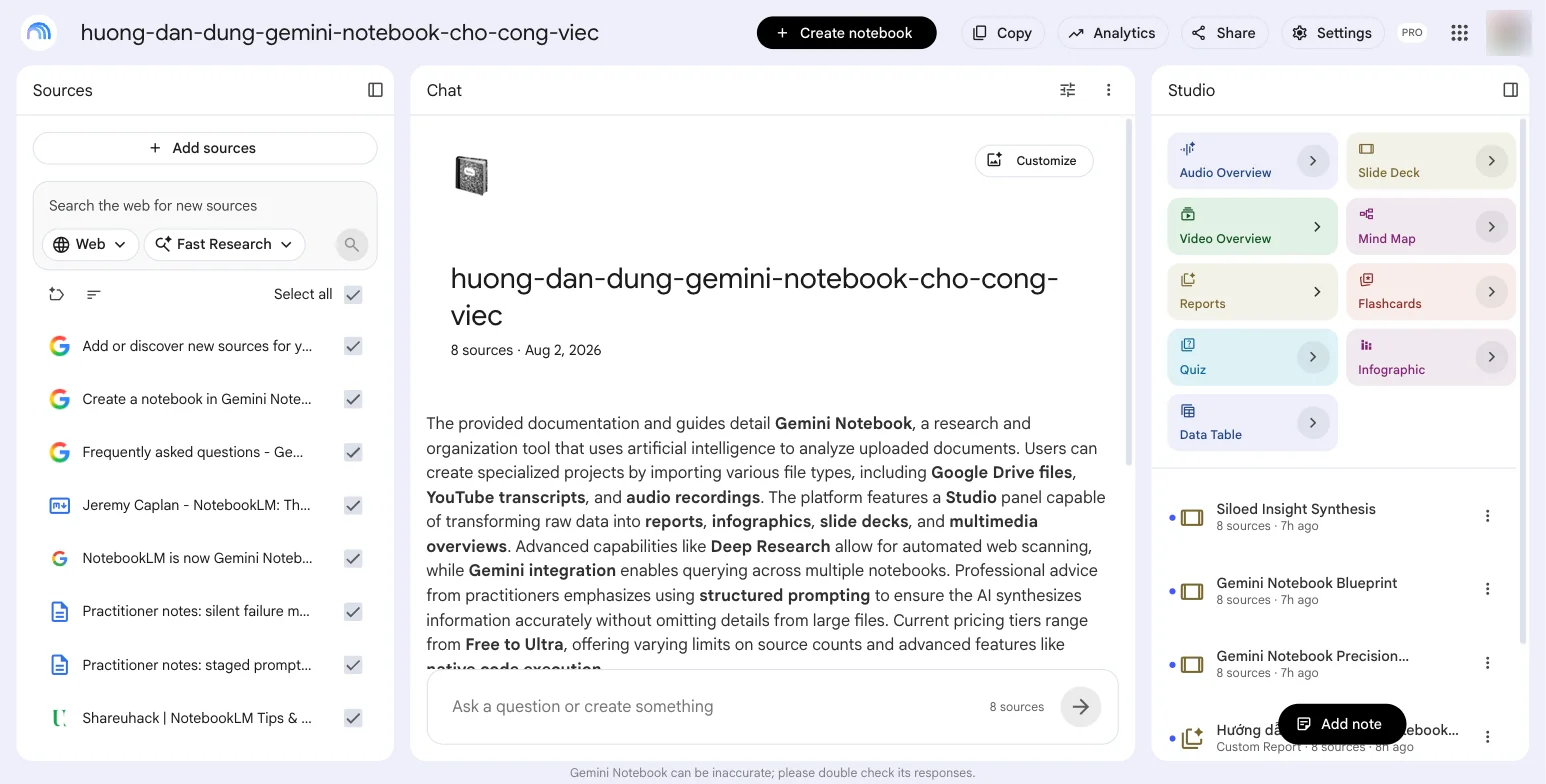
Open the "Sources" panel and check that the document count matches what you intended to add.